My Rebuilt Kitchen
by Paul
(Stockport)

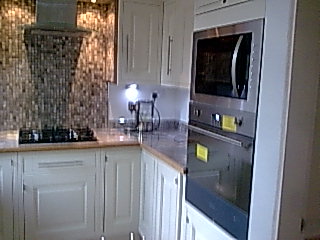
Almost completed kitchen cooking corner
I have a small kitchen area of 14'6" x 8'6", with a back entrance door and dining room door effectively splitting the kitchen in two.
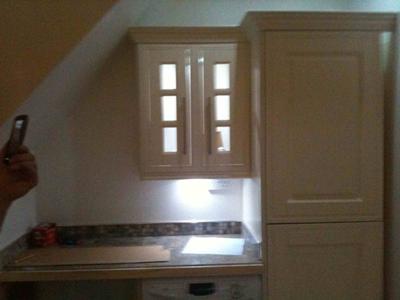
The kitchen had a closet/pantry area which was built to conceal the underside of the staircase, leaving a small width of 40" in which the tall fridge was placed.
To create more space, my dad helped me to remove the brick pantry walls and to support the floor joists above with a sturdy beam. This enabled an area to place the washer and drier, integrated fridge freezer and a work top, whilst still retaining the space and access to the lower section of stairs, albeit through a small doorway, once the washer is dragged out.
The existing floor was quarry tiled which had to be removed and because the house was built around 1935, beneath the tiles was fortunately dirt.
It was fortunate because the drain for the washer had to be placed within the floor and so I made permanently sealed joints in the pipework and concreted over a visqueen membrane.
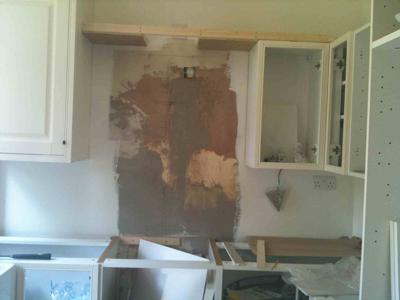
A kitchen design often results in a different layout, power points have to be repositioned, lighting moved and both added to. I wanted LED lights in the kitchen kicker boards and under the wall units, recessed spotlights in the ceiling, power points for the white goods and repositioning of the hob and oven, which
resulted in rewiring the whole kitchen.
Finally ready for the kitchen cupboards which had been pre-ordered from the biggest DIY store, I built the units and positioned them for fixing.
Even though the supplier had used CAD software to calculate the exact sizes and prepare the kitchen list, they didn't all fit correctly, which meant I had to re-configure the positioning of individual units.
So much for CAD.
Next came the worktops. I wanted granite but it was too expensive, so settled for a tiled work surface. I reinforced all the base cupboards to support the 3/4" external plywood tops, because once I had cut and fixed the tiles ( I used floor tiles ) I didn't want any sagging, which would have resulted in cracked tiles.
After generously screwing the plywood to all the supports, I edged with profiled oak and tiled to the raised edge.
One of the harder tasks I had to complete was the holes through the walls to accommodate the extractor outlet. Not having a core drill, I drilled a series of small holes just wider than the circumference of the flue, then bashed the bricks out. They were stock/solid bricks and very hard so took me hours to complete.
The whole kitchen project took me 3 months to complete, but I did only have time after work each day and weekends.
It was well worth the time and effort and probably save me in the region of 3 thousand.
The finished kitchen is a triumph but there were many obstacles to overcome
Comments for My Rebuilt Kitchen
|
||
|
||


